
Welcome
I really started The Outdoor Gems to share outdoor experiences through photography and storytelling to inspire more people to get outside. If more people got outdoors; took a walk, hike, went snowboarding, sat around a campfire, and surfed in the ocean, I think the world would be a better place.
-Jeremiah
The Latest

Snowboard Tuning, How to wax and take care of your board from Home
It’s that time of year where the lifts are spinning at your local ski resort, new gear is hitting the stores, and you might be looking to tune that snowboard that has been sitting in the garage all summer long. There’s actually a lot you
Disclosure: When you buy something through the Affiliate product links I have created below, I earn a small commission. I only promote products and companies I support as well as believe in.
It’s that time of year where the lifts are spinning at your local ski resort, new gear is hitting the stores, and you might be looking to tune that snowboard that has been sitting in the garage all summer long. There’s actually a lot you can do from home to keep your board riding smoothly on snow. It’s nice to have these skills so that you know how to take care of your gear! Also, if you ever want to work in a tune shop, knowing how to wax and do minor upkeep on a snowboard is a good start.
Like a car, a snowboard needs routine maintenance to give you the best experience possible on the mountain or hill and can make all the difference when riding two feet of powder or spring slush. In this post I’ll be covering the different steps of Waxing and Tuning your snowboard, what you need, tune tips/terms, and the importance of taking care of your gear! Alright lets gooooo.
Why do I need to Wax my board
The main reason is snow temps change through out the season and in order for your board to glide across the snow properly you need to maintain the base with the proper wax. Also, your base has pores and over time, snow will dry the base out. Therefore in order to maintain speed it’s important to wax your board. Just like a car, home, or bike, upkeep is important to keep your equipment in great shape and give you the best experience possible!
Although this blog post is about waxing your board from home, I would highly recommend still taking it to a great tune shop in your local area from time to time. The best tune shops have really good equipment and knowledgeable staff with years of experience. They’ll also be able to fix any repairs that you can’t do on your own.

How Often Should I tune my board
It all depends on how often you ride and how much abuse your snowboard takes! You can also look at the base and see if it looks dry or has scrapes and scratches throughout the base. I would say on average if you are riding 2-3 days per week once every couple weeks should be just fine. If you are looking to ride the terrain park it would be a good idea to wax your board once a week to make sure you have the right amount of speed for jumps as well as rails.
Where should I wax my board from home
Ideally a garage or tool shed are the best places to wax a board, especially if there is a work bench of some kind. This will make it a lot easier when working on your board, mainly when your scraping wax off the base. Put on some music, hang out with your friends, or grab a drink and have fun. Also if you can find someone whose worked in a tune shop or has extensive experience with waxing snowboards, it will be very helpful so you don’t get into bad habits.

What are some terms to know
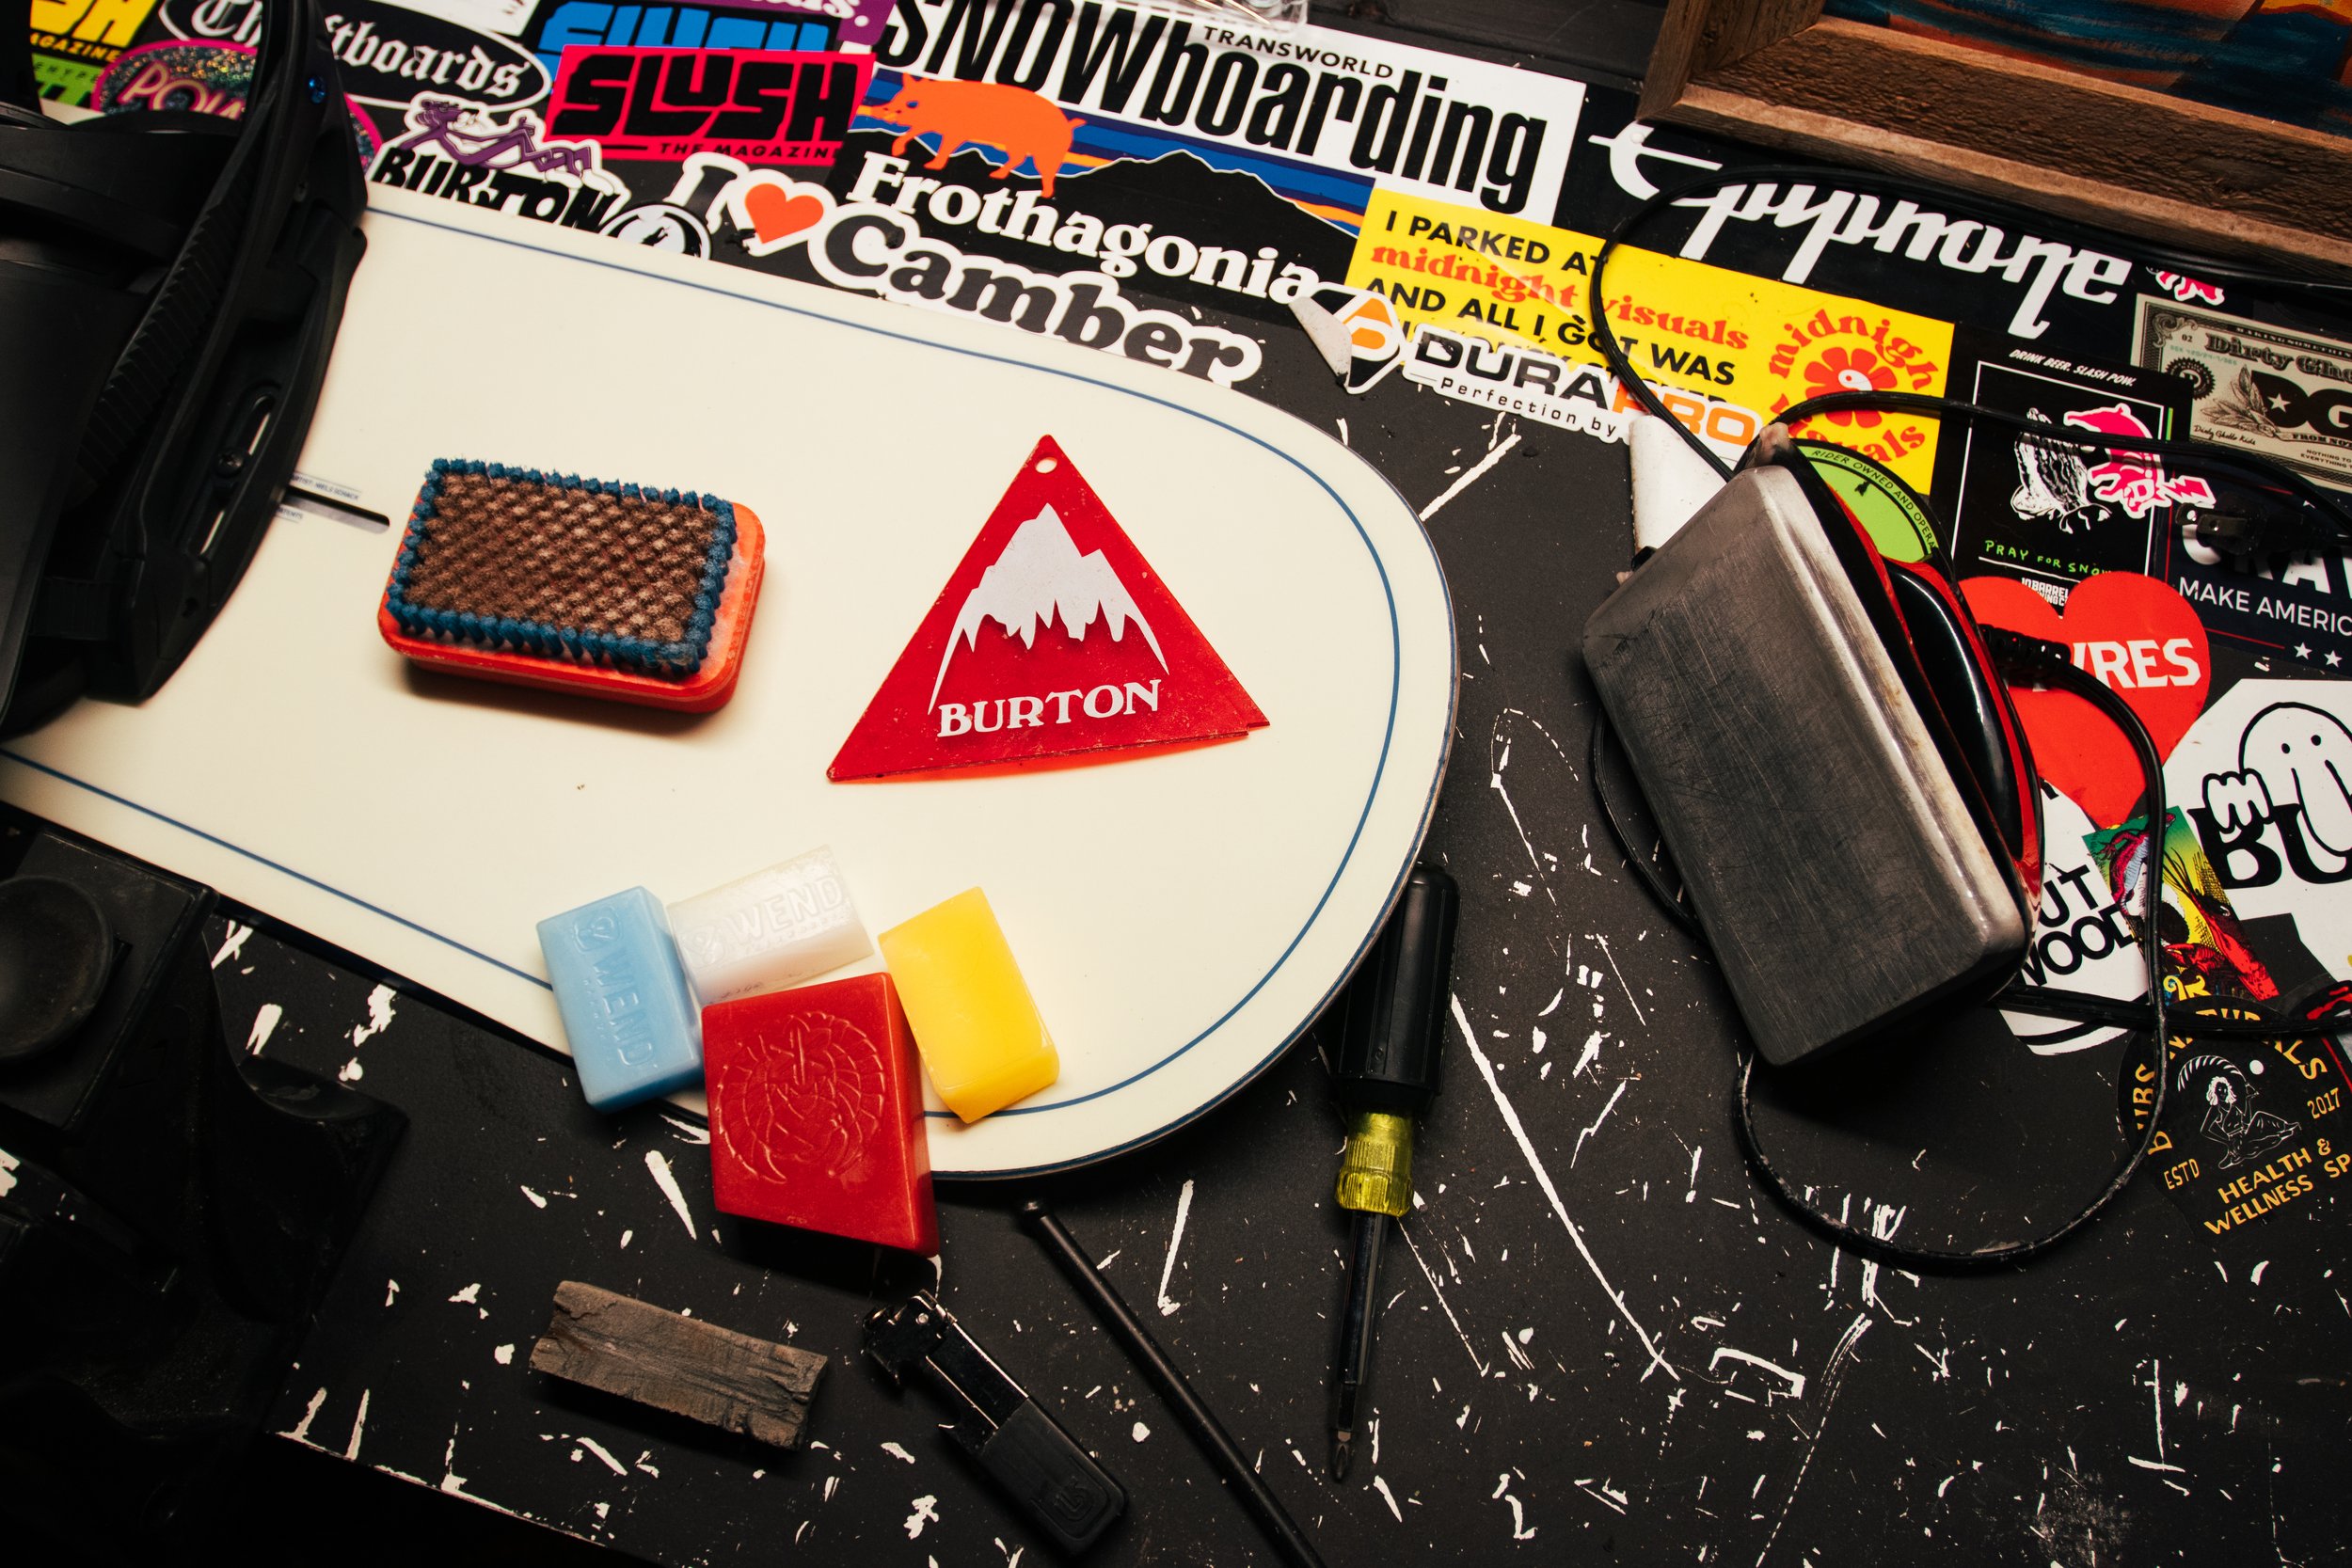
Base- The bottom of a snowboard or skis
Wax Iron- This is the tool you use to melt wax into your base
Scraper- What you use to scrape the wax off your board
Brush- After your done scraping, you’ll use a brush to smooth out the base
Wax- The material used to melt into your base
Temperature ratings- Wax has a snow temp range to follow, the most common being an all temp wax. You’ll also use a spring wax for warm temperatures and a cold wax for those ice cold days.
Core Shot- When you hit a rock or something sharp that digs through your base to the wood core.
Tuning Vises- What you put the board on to wax it
Edge- The metal part attached to your base. Allows you to be stable and turn on snow.
Edge Tuner- A tool used to hand sharpen your edges
Gummy stone- What smooths the rough parts of your metal edges. Somewhat soft.
Burrs- Rough areas on your edges caused from use
Diamond Stone- Used to also smooth out yours edges and contact points so that the edge doesn’t catch on the snow when riding.
Base Grind- Running your board through a machine to smooth it out
P-Tex-Used to repair your base if you have a core shot or ding in the base. Never use this material on the top sheet.
Epoxy- A glue like material used to fix top sheet damage
Contact Points- The metal part of the edge that touches the snow
Detune- Smoothing out sharp parts on the edges of your snowboard or skis
Sintered Base- faster, more durable, more porous, holds more wax
Extruded Base- holds less wax, requires less maintenance, and are slower

What supplies do I need
The tuning supplies you’ll need can be found at your local snowboard or ski shop and online at places like Burton.com
Wax
Waxing Iron
P-tex
Wax Brush
Lighter
Scraper
Edge Sharpener
Gummy Stone
Ceramic Stone
Apron
Tuning Vises

Step 1
The very first thing I like to do is to take the bindings off. You don’t want to wax your board with the bindings on because the heat from the iron could damage them. Put them off to the side and then make sure to wipe the base down with water. or base cleaner. It’s important not to wax the base when there’s dirt, debris, or hair because that can melt into the base and effect speed and maneuverability on the mountain.
Another thing to keep in mind is if you have black marks on the bottom from riding rails, the BEST way to get ride of this is to either scrape it off with a wax scrapper or melt warm temp wax over the marks and then scrape off right away.

Step 2
Next you’ll want fix and minor dings, gashes, or core shots in the base of the board. To do this you’ll need a lighter and a stick of PTEX. Ptex is essentially a type of plastic. It is available in clear and black. Personally I like the black color because if the clear gets too hot it will burn and leave a brownish color. AVOID having Ptex drip on your hand. It will be very painful.
You’ll light the end of the stick with a lighter, rolling the stick with your fingers as you get the stick to stay lit. Once lit, keep the flame low with the flame color blue. This means the ptex will be very hot when going into the damaged base, which means it will hold into the base better. Evenly drip the heated Ptex over the damaged area. AVOID getting the flame too large, causing the Ptex to get smoky. Once filled in, wait for the repair to dry. It will be ready to scrape after about ten minutes.
Use your wax scraper to scrap off the Ptex until smooth. If the repair isn’t completely filled in with Ptex, repeat the above steps until the base is nice and smooth.

Step 3
Choose the wax based on what the temperature will be for the next week. Most of the time you’ll use an all temp wax that has a range of 10-40 degrees fahrenheight (-12 to 4 degrees celsius). Since the edges of your base take the most abuse when riding on snow a good trick is to use a harder wax (colder wax) on the edge part of your base.
Check the packaging of your wax to see what temp the iron needs to be at and start to drip the wax evenly over the base by sticking the wax bar on the iron. Make sure that iron doesn’t start smoking! as this indicates that the temperature on the iron is too high.
You won’t need to drip wax on the nose or tail, as they don’t touch the snow very often. If you like to do presses and butters then wax these parts of the board, otherwise save time and wax. Try to cover most of the base with wax so you don’t leave any dry spots on the base.

Step 4
Next you’ll want to press the wax into the board. A lot of people think you should go over the base in a circular motion with the wax, but this is actually what you should avoid doing. The reason being is when you wax your board like this, it goes from hot to cold all over the board and can also leave scratches in the base. You want to wax the board how you ride it, which is tip to tail.
What you want to do is press the wax into the board from tip to tail, pulling the iron down in a straight line and then pushing it back up the same line. When you pull the iron towards you put pressure on the nose of the iron. When you push the iron away from you, put pressure on the heal of the iron.
This will really allow the base to absorb as much wax as possible. Pro tip-if you feel the top sheet is luke warm, then you know the wax has been absorbed into the base. Create even lines across the base until it’s covered. Wait until the board is cool to touch for scraping.

Step 5
Now that the board is cool, it’s time to scrape the wax off your board. One thing to note is that your scraper will dull over time. Another pro-tip is to use a fine or ultra fine grade piece of sandpaper to sharpen the scraper.

When first scraping, you’ll want to push the wax away from you (see photo below), while keeping the scraper even with the base. It also helps to flex the scraper as you push wax off the board.
You’ll want to scrape the board how you ride it, tip to tail. Another pro tip is to scrape the top area of the board before scraping tip to tail. This way when you scrape tip to tail, you can do it more evenly without the scraper leaving the board too much. Overall, it helps prevent damage to the base. Make sure to scrape as much wax off as you can before using a brush.

Step 6
Now that you’ve scraped as much wax as you can off, you’ll want to take a brush and smooth the base out, getting rid off any uneven spots that you missed with the scraper. Again brush tip to tail, just how the board is meant to be ridden. Try to make sure there’s no access wax left on the board as this will slow you down on the mountain.


Step 7
The last thing I like to do, is sharpen the edges. Machines will do a much better job with this at your local tune shop, however you can use a hand tool that allows you to make your edges nice and sharp. Swix makes a good one.

Follow the arrows on the tool and use the 1 degree option. Snowboards typically come out of the factory at 1 and 1. Which means 1 degree off from 90 degrees for the base and side edge, so 89 and 89. Make sure to start with the Base edge FIRST and then sharpen the side edge. You should feel the tool catch the edge while smoothing it out. Do this a number of times until the edge is nice and sharp. If you are using the tool incorrectly on the edge, you will be able to hear a weird noise.

Step 8
Next you will want to smooth out the edges and detune your contact points. The contact points will be near the tip and tail and are the part of the edge always in contact with the snow. You want these to be smooth and not sharp, so that they don’t catch on the snow.
A diamond stone will work best for smoothing out contact points. But if you only have a gummy stone, that will work too. Use a gummy stone for the rest of the board, to smooth out your entire edge.

Step 9
Now that the board is waxed and tuned up, put your bindings back on and set up a stance that is comfortable to you. You’re bindings will have different angles on them. I would mess around with those until you find something that works. For stance width, ideally you want something a little bit wider then shoulder width. Each snowboard will have reference points and how much the width is from those reference points.


It’s also a good idea to periodically check binding screws, buckles, straps, and highbacks to make sure everything is dialed. The last thing you want is to have your binding’s malfunction while on a snowboard trip.
Step 10
Lastly, go out and ride your board! Whether your riding solo or with friends remember to keep it fun

A hot wax will typically last you 4-7 days on snow. Warmer temps will take the wax out of your base a lot quicker. Other then that, tuning your own equipment can save you money over the long run and is a great way to understand how to maintain it.
Thanks for reading the blog! If you liked this post, subscribe to our email list for information on the latest outdoor content. Looking for snowboard trip ideas? Check out our post on Jackson Hole Ski Resort. See you on the next post!

Colorado Hiking, a complete guide to Black Powder Pass Off Boreas Pass Road
One of the best things about Colorado in the spring, summer, and fall is the hiking. What seems like endless amounts of trails through out the state, there’s always a
Disclosure: When you buy something through the Affiliate product links I have created below, I earn a small commission. I only promote products and companies I support as well as believe in.
One of the best things about Colorado in the spring, summer, and fall is the hiking. What seems like endless amounts of trails through out the state, there’s always a new path to explore. I’ve always loved the history that the state has including old mining history and historic buildings that are still standing. One of my favorite hikes that I’ve done so far is Black Powder Pass, just outside of downtown Breckenridge.
The drive to the trailhead on Boreas Pass Road is one of the best parts, especially in the fall! In this post I’ll be going over directions to the trailhead, what the trail is like, best times of the year to hike, where to camp, and what to expect. Cool, letsss goooo.

What’s the story behind Black Powder Pass
Originally Boreas Pass was part of a railway that connected Breckenridge to Leadville crossing over the continental divide, seen at the trailhead. However by the late 1930’s with the decline of mining and the rise of cars and trucks, the railway became abandoned. It wasn’t until 1952, that a road was installed on Boreas Pass.

The group of small houses at the top called the Section house were built in 1881 and served as the housing for workers who maintained the section of the Boreas Pass Railway. Today the Section house is a hut for back country skiers, splitboarders, and people who snowshoe in the winter

How to get to the trailhead
Depending on what direction you are driving from you’ll want to turn onto Boreas Pass Road and take that all the way to the top until you hit a dirt road, with a parking lot on your left. The road overlooks the ski resort and town as you drive up. There’s a couple pull offs, so grab a few photos before you drive to the trail! (the drive and hike are great for photography).
This road is somewhat narrow, with steep drop offs, so drive carefully! AWD isn’t required, but it helps to have. As you start driving on the dirt road you’ll go around a couple corners before you come up on a group of Aspens, from there you’ll go past Bakers Tank (A Giant Red water Tank) all the way to the top until you come up on a parking lot with an old railroad track.


The dirt road gets a lil bumpy towards the top, so drive slower.. Below I’ve listed major areas including downtown Breckenridge with distances and times. The two major highways you can take to get to the trail are either I70 or 285 South.

Trailhead Coordinates: 39.410310, -105.968420
Denver- 2 hours/87 Miles/140 km
Boulder- 2 hours and 20 minutes/96 miles/154 km
Downtown Breckenridge- 35 minutes/9 miles/14 km
Vail- 1 hour and 20 minutes/46 miles/74 km
Colorado Springs- 2 hours and 20 minutes/103 miles/166 Km


What should we pack
Water Bottle- Stay hydrated, especially at high altitudes! I like Hydro Flask because they keep your water cold for up to 24 hours.
Hiking Boots- Make sure you have good support and grip when out hiking. Colorado trails can get rocky, therefore I recommend a good pair of hiking boots such as Merrell! If you don’t like boots, they also make great hiking footwear.
Sunscreen-If you’re outside in Colorado, especially at a higher elevation it’s important to protect your skin. I like Sun Bum, based out of California, because it is none greasy.
Sunglasses- Often overlooked, if you plan on hiking during the day at high altitudes, you must have sunglasses. I’ve always been a fan of Dragon shades because they are easy on the wallet and have great depth perception and clarity.
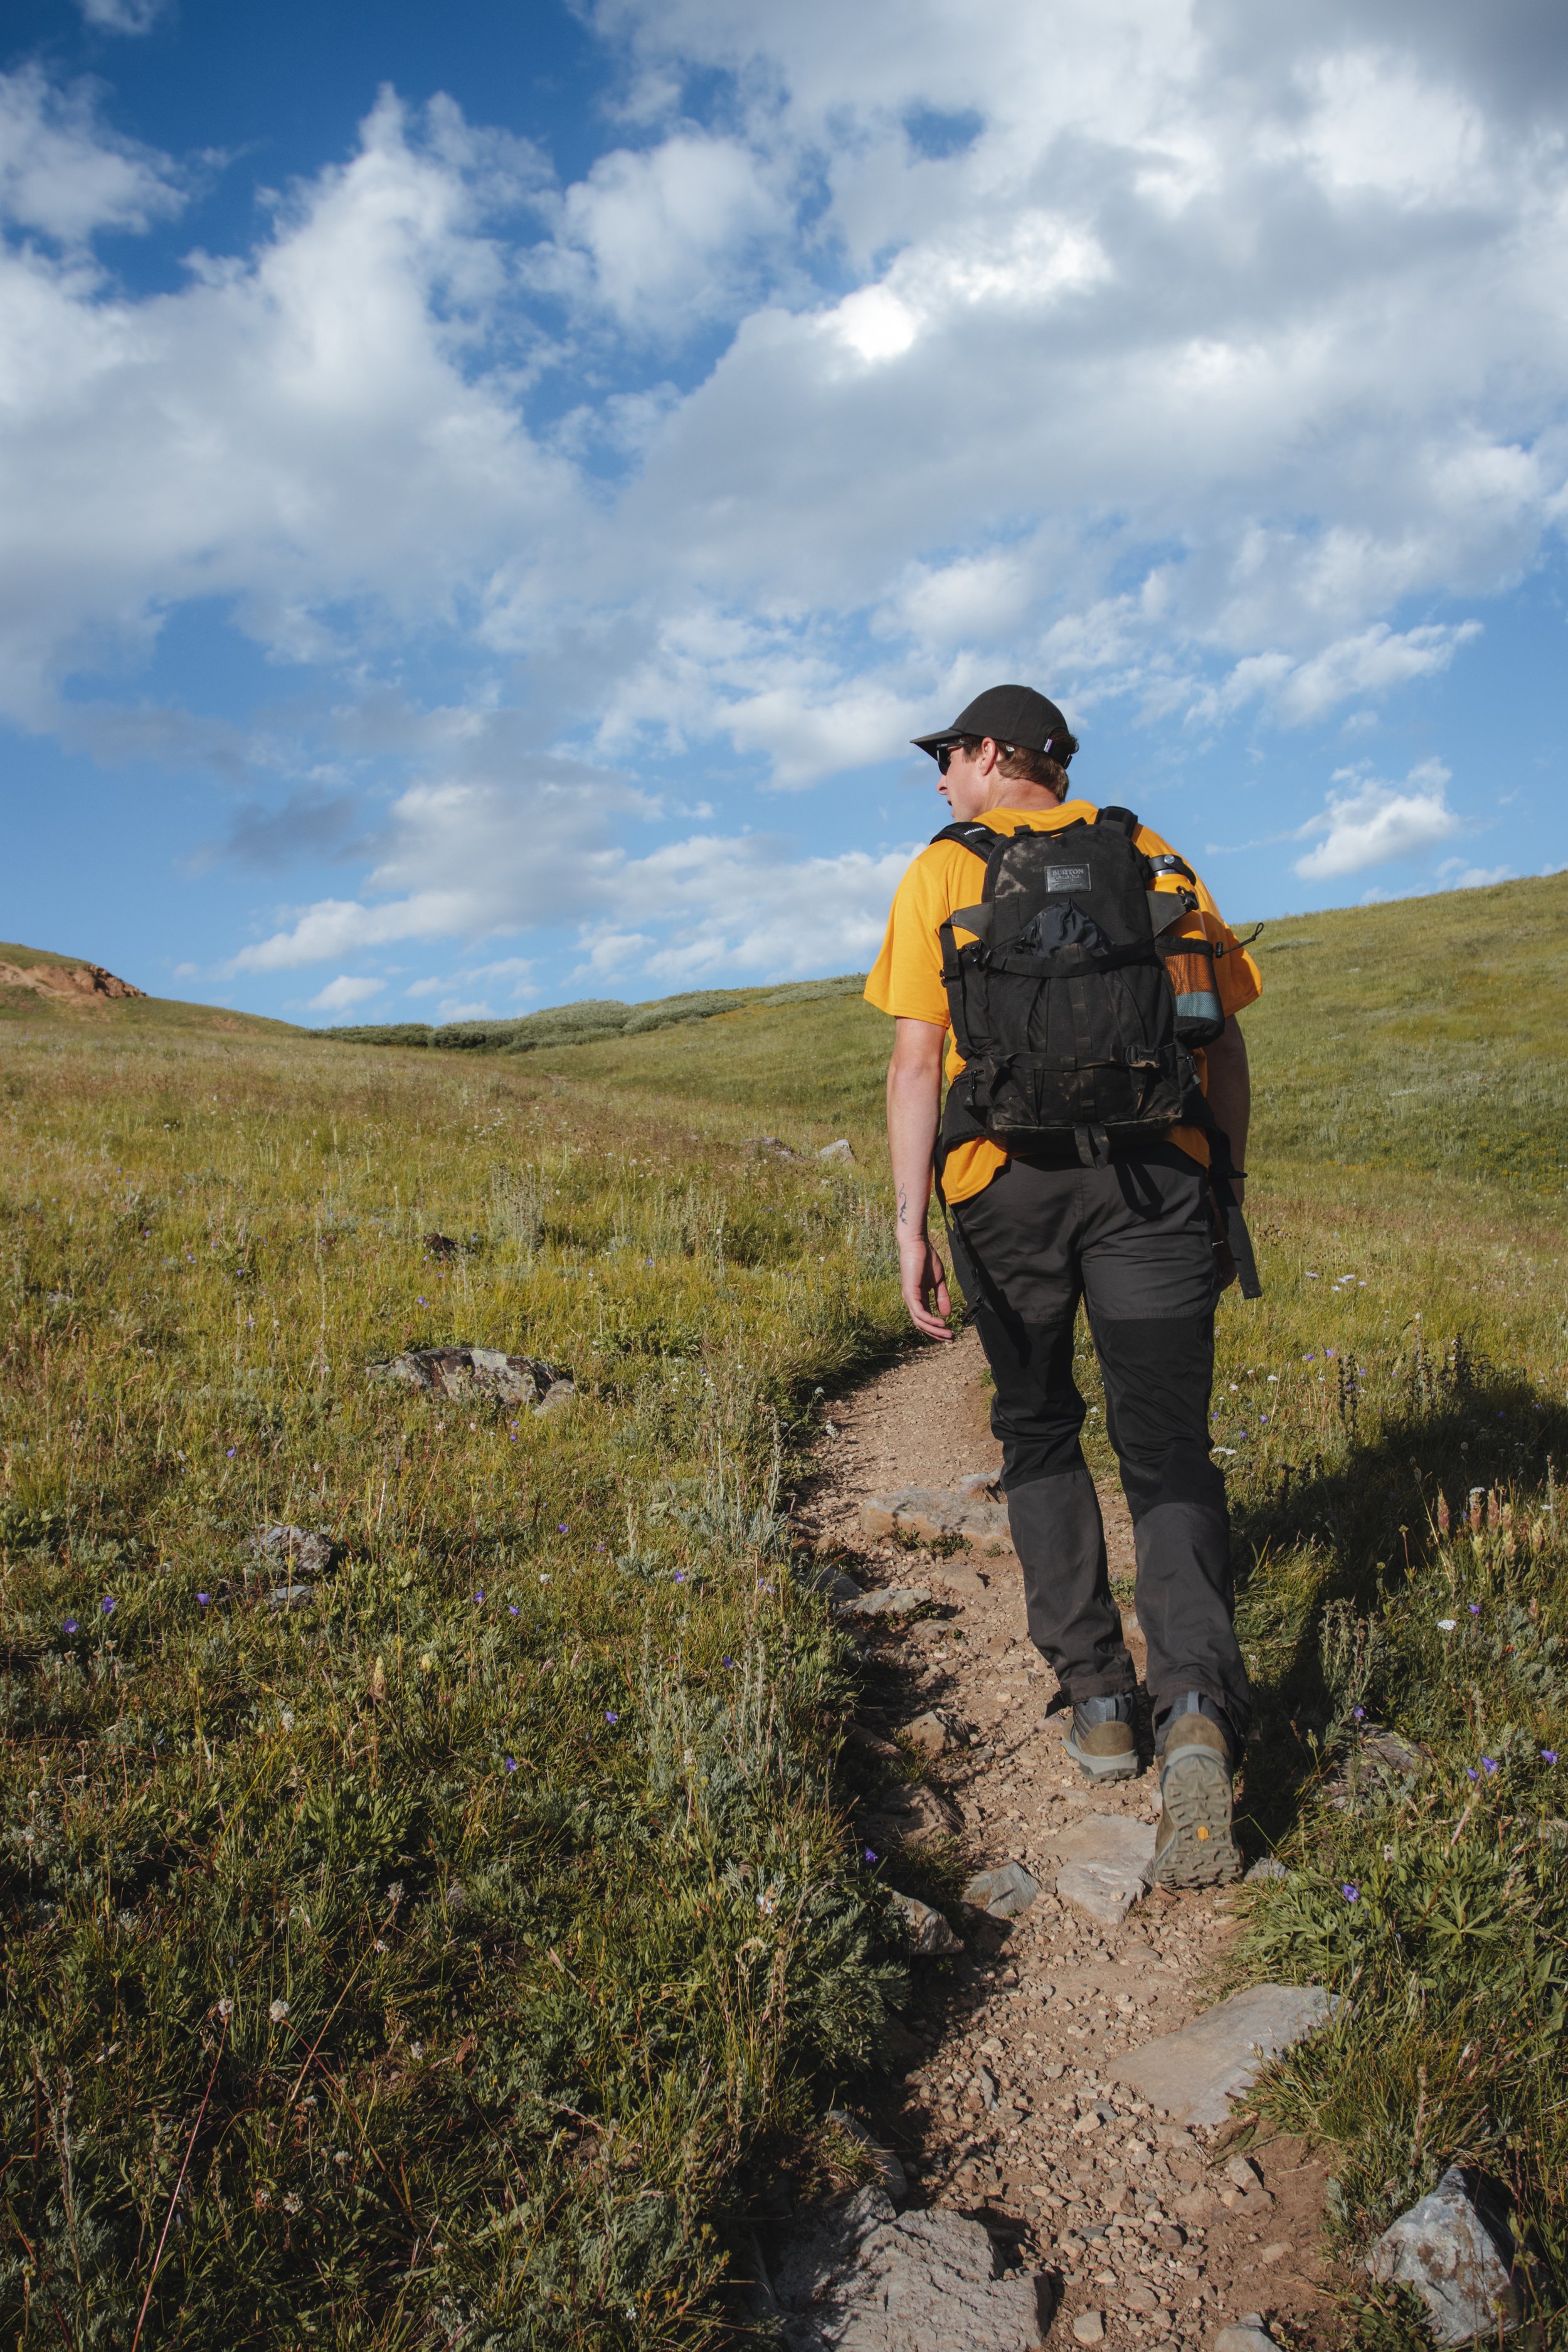
Hat- Always pack a hat when going for a hike!, I love Burton hats, especially the tech, lightweight ones.
Backpack- I always like to hike with a bag to keep my water bottle, camera, and snacks for the trek, maybe even a beer or two for the top :) Burton makes amazing outdoor bags, backed with a lifetime warranty!


Any tips for hiking Black Powder Pass
Be careful when driving to the trailhead as there are steep drop offs with no guardrail on the dirt road, AWD and vehicles with good tires is a plus.
Bring a rain jacket and extra layers, even in the summer!
Visit in the Fall, mid to late September is one of the best times to be on Boreas Pass Road
Avoid weekends if you can due to more vehicles and people
Summer is a great time to catch the Wildflowers
You are at a higher elevation (11,482 Feet) take it easy and drink plenty of water!
Thunderstorms can pop up in the afternoon, however if the weather looks good, later afternoons in the evening are one of the best times to be on this trail!
Trail Stats
Trail Type: Out and Back
Distance: 3.4 miles/5.5 km
Difficulty: Moderate
Elevation Gain: 1,000 feet/305 meters
Dogs: On leash
Trail Time: Depending on speed and how long you stay at the top 2-3 hours
Is there parking and restrooms at the trailhead
There are no restrooms at the top, however there are two smaller parking lots on both sides of the road. Both lots are pretty empty on weekdays in the afternoon.
When is the best time to hike this trail
The best time to hike this trail is Late Spring to Early fall. Due to snowfall, Boreas Pass Road will close after the first parking lot at the top. You can still access the cabins in the winter by booking the Section House.
The busiest time of the year will be on weekends during the Fall when the leaves are changing. A lot of people will come up from Denver or the front range area to check out the fall foliage (leaf peepers). Try to come up midweek if you can as the fall colors are one of the best times of the year to hike in Summit County. Summers are great because of the wildflowers and there are a lot off Boreas Pass Road mid summer.
My favorite time of day to hike this trail is in the late afternoon-early evening because you get really cool golden light surrounding the hike and the sun is also not as intense as a mid day hike.


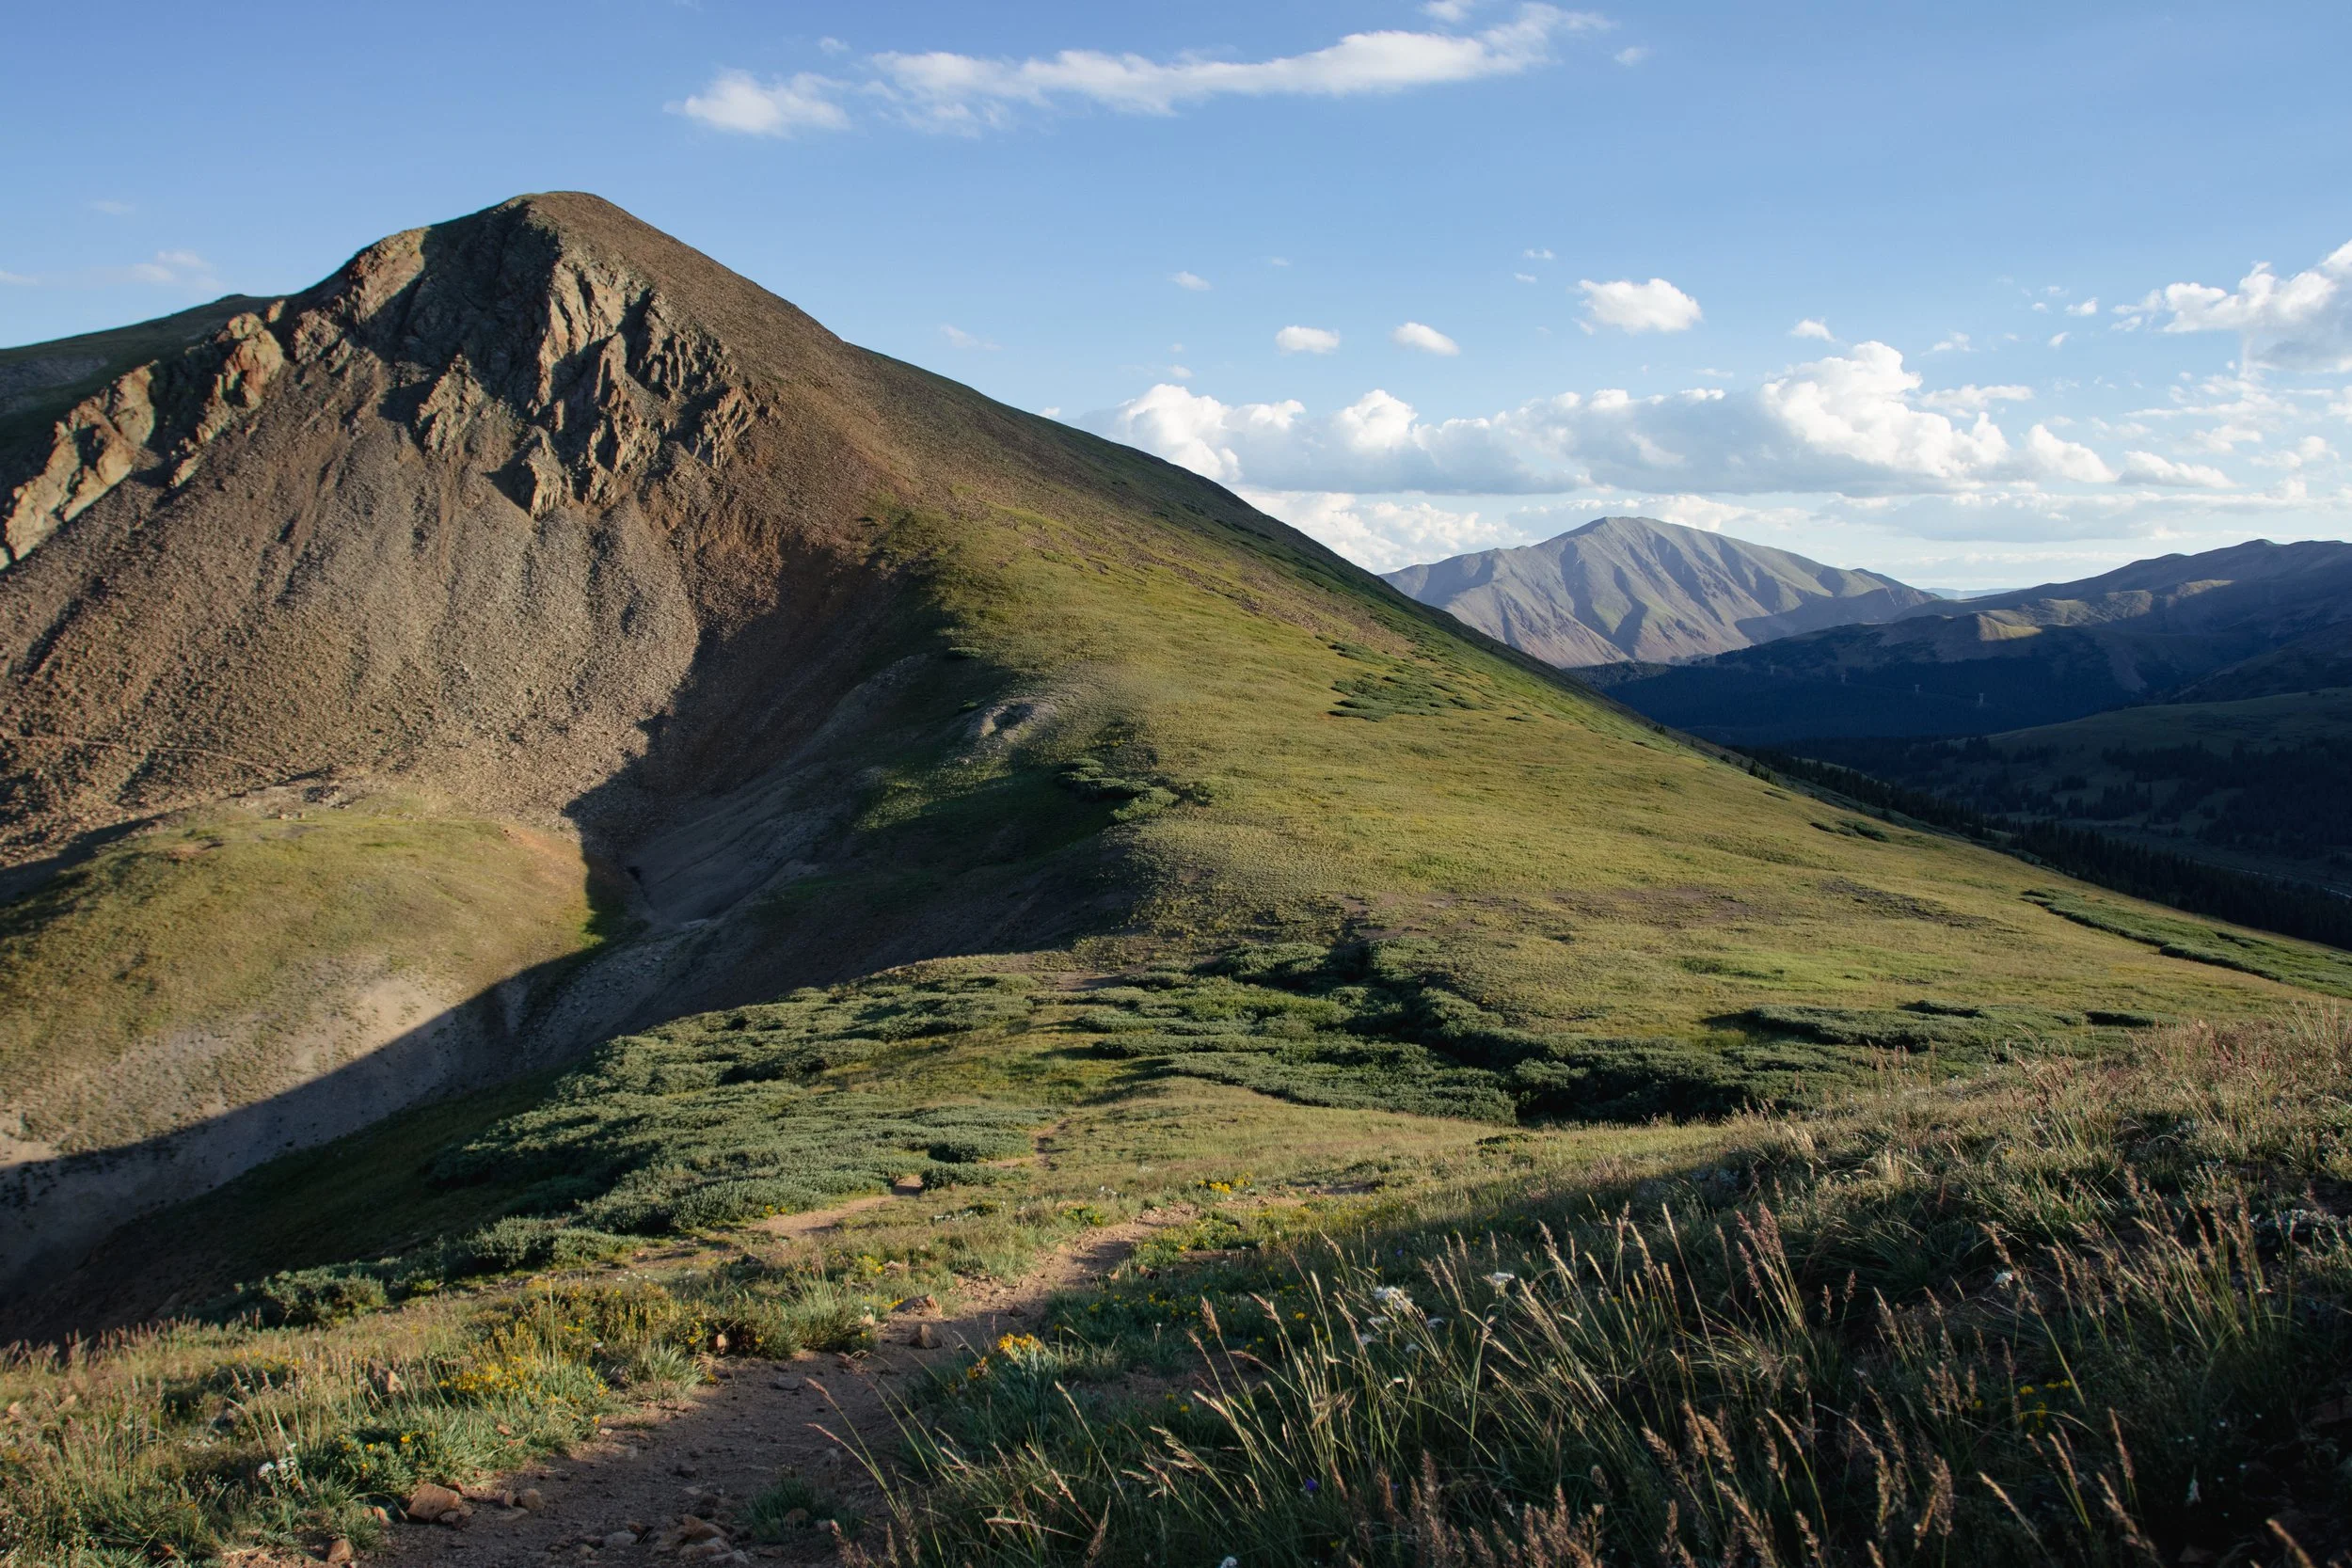
What is the trail like and is the hike difficult
The trailhead will be at the base of the historic Section House and old railroad tracks at the top of the continental divide. The continental divide is the line that runs from Alaska to Mexico and on one side water drains into the pacific ocean and on the other side the Atlantic ocean. The trail itself is part of the White River National Forest, but as you look to the right when driving up towards the top, that is the Pike National Forest.


You’ll start your hike at the base of the Section House and is worth walking around and checking out! As you start hiking you’ll notice most of the trail is exposed with a couple of portions that walk through pine trees and dead tree stumps. The trail overall isn’t too strenuous and doesn’t take too much time either which is what I liked.
As you make your way towards the top, turn around and you’ll notice most of the ten mile range and next to it Mt Helen and Mt Quandary! It is one of the best views in the area in my opinion. Once above tree line, the trail itself is pretty straight to the top and you’ll be able to see Baldy Mountain to your left. Pack a lunch, snacks, or even a couple beers and enjoy the views at the peak.


At the peak you’ll also notice the backside of the mountain has views too, this portion overlooks the White River National Forest!

Is there camping in the area
Yep it is all dispersed camping (free), but with numbered camp sites. First come, first served and no public facilities. Pack out what you packed in and make sure to check weather and fire restrictions ahead of time.
Is the Boreas Pass Overlook worth checking out too
Yep, If you are in Breckenridge I highly recommend driving up to Boreas Pass road, and walking along the road. You can do this regardless of the time of year. Winter can be one of the best times to head up to Boreas Pass, as the town and surrounding peaks are covered in snow. Park in the first parking lot you arrive at and walk part of the road. In the fall walk along the road while checking out the fall colors or hang out and enjoy a sunset view over the ski resort.


That’s it for the Black Powder Pass Trail. If you’re vacationing in Breckenridge or even just passing through I highly recommend this hike! If you done this hike before or having any questions, leave a comment below. Looking for more information on outdoor trips, hikes, tips, and gear information, feel free to subscribe to our email list below! Thanks for reading the blog and I’ll see you on the next post.
Looking for other Colorado Hikes? Check out the Ptarmigan Lake trail, just outside of Buena Vista.


Meet Jeremiah
Growing up, I loved being outside. I took a lot of cool trips with my family, whether it was camping, going to the beach, road trips, and national parks. Even though I didn’t fully appreciate those experiences at the time, as I got older I started getting more into the outdoors and traveling, reconnecting with my past. The feeling of traveling or going somewhere new always seems to give a sense of excitement or adventure.
Snowboarding and boardsports in general have been a passion of mine for over 20 years. I always loved the culture that came with it; from local retail shops to magazines and videos, to riding with friends as well as geeking out on the latest gear, it’s all part of the experience. After working in snowboard/outdoor gear shops for the past decade along with traveling to different outdoor places, I decided to put all of that experience in digital form to inspire and connect with other people.